
In this article, we will guide you through how to create an SMS Campaign with quick upload in Apifon platform.
Task Roadmap
To create an SMS campaign with the quick upload, from the Dashboard select Campaigns -> Messagind - follow these steps:
-
- Select "Campaigns -> Messaging".
- Select "Add".
- Select "SMS Campaign".
- Towards the bottom of the page enter the name of your campaign.
- Click “Create”.
Campaign Settings
To set up your campaign, follow these 5 steps:
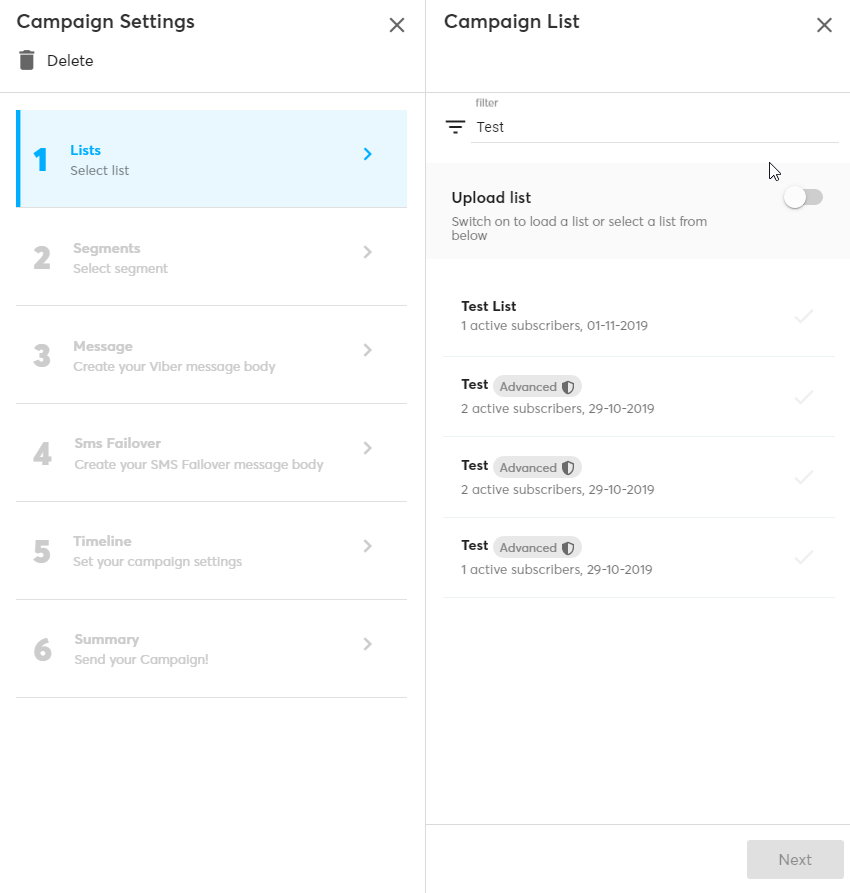
Lists
To quick upload, a list, follow these steps:
-
- Enable “Upload list”. Keep in mind that you can upload up to 3000 subscribers with this option.
- The supported file extensions are .xlsx, .xls, .csv (comma delimited or semi-colon).
-
- You can also download samples of these files and enter the subscriber’s information directly into them.
- You can choose to allow duplicate entries by disabling “Prevent duplicates”.
Keep the “Prevent Duplicates” option active, so that duplicate entries won’t be entered in the list. - Locate the file to be uploaded and click “Next”.
Preview Subscribers
Here you can find a preview of the uploaded data and match the columns of your file with the columns of the list.
-
- If the file you uploaded has labels on the first row, keep the first option active.
- If you keep the “Set International Format” option active, you automatically add the prefix for the numbers on your list. Keep in mind that you should always set the number prefix in advance.
- Click “Next”.
Results
When the import is complete you will be able to see how many subscribers have been uploaded from the results field.
Segments
Keep in mind, that you can’t select a segment of your list if you choose the “quick upload” option.
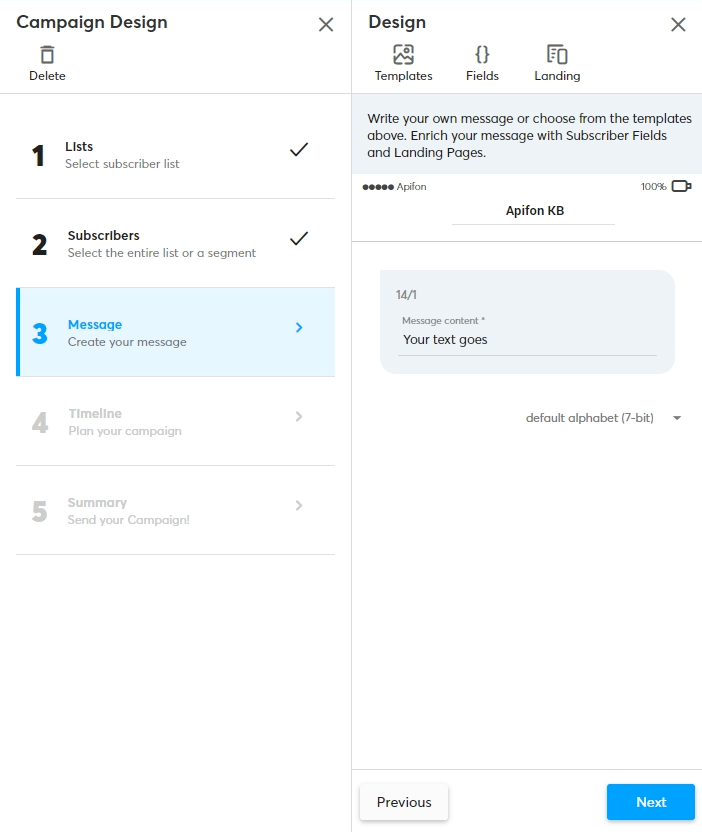
Message
To write your message, select the Sender ID (up to 11 alphanumeric characters). Write the body of your message and keep in mind that there is a limit of 160 characters.
-
- If you have already created a template, you can choose it from Templates.
- If you wish to personalize your campaigns, click Fields to add a specific Subscriber Field.
- If you have already created a template, you can choose it from Templates.
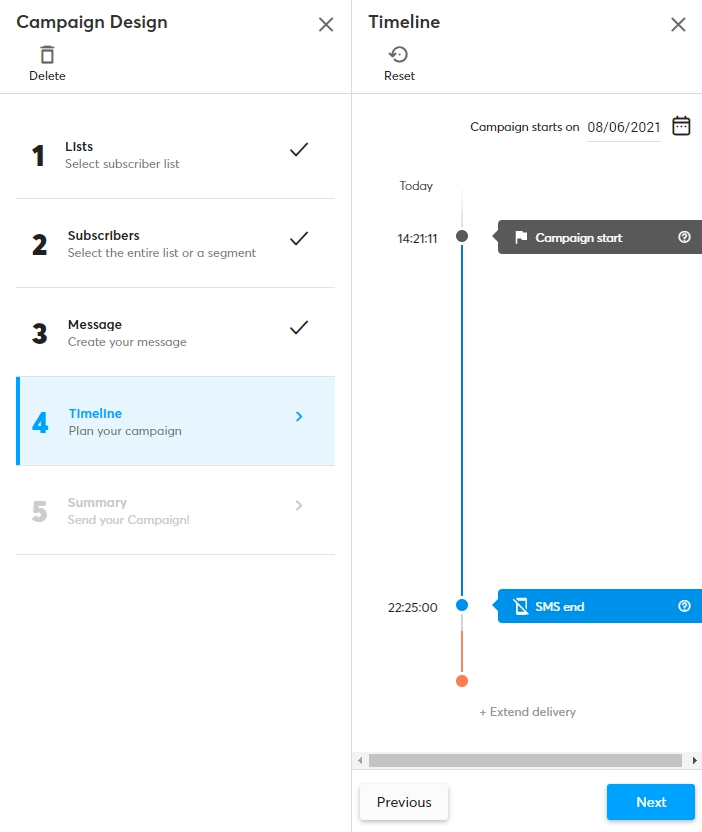
Timeline
To schedule your campaign, follow these 3 steps:
If you wish to send your campaign instantly, ignore and click “Next”.
-
- Select a date for your campaign.
- Click and drag the "Campaign start" icon to your preferred time. You can also set your campaign’s expiration time in the same way.
- Click “Next”.
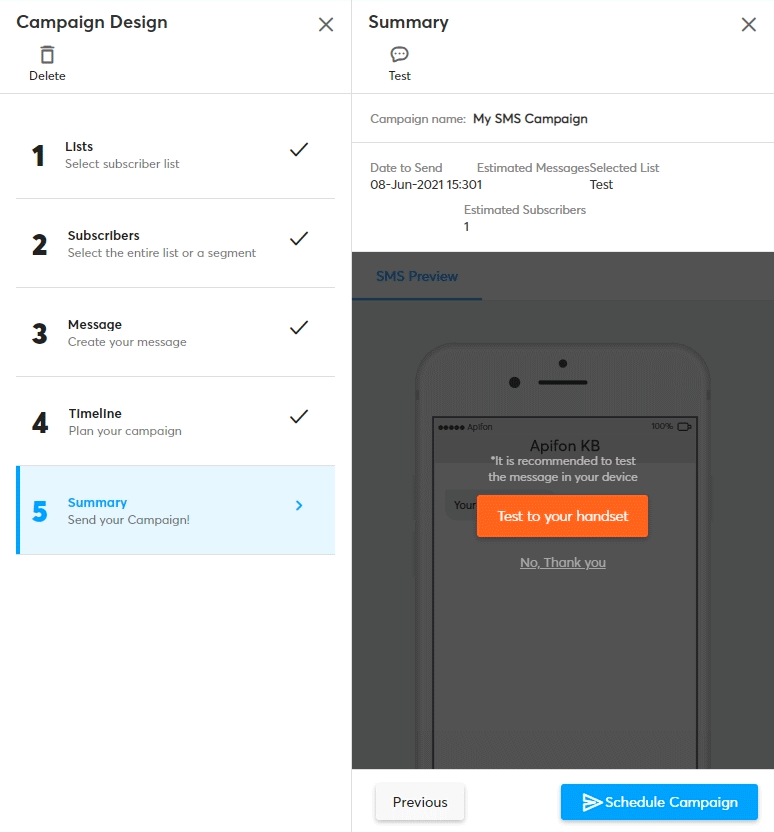
Summary
Check the overview of your campaign including the campaign’s name, sending date & time, number of subscribers, number of estimated messages, and selected list.
The mobile phone screen shows you a preview of your message as it will appear on the recipient’s device.
Test on your handset
Before sending your campaign, send a test message to your own mobile number or a group of numbers by following these 3 steps:
-
-
- Select “Test to your handset”.
- Enter the mobile numbers for the test.
- Press “Send”.
-
By pressing the “Start Campaign” button, your campaign will be sent.

Now you know how to create and send an SMS campaign with quick upload in Apifon platform.
Thank you for reading!