![apifon-full-lock-up-purple-1.png]](https://kb.apifon.com/hs-fs/hubfs/apifon-full-lock-up-purple-1.png?height=40&name=apifon-full-lock-up-purple-1.png)
With Automatic Top-Up, your Apifon account balance is automatically topped up whenever it runs low, helping you keep your messaging activities running without interruption.
Once enabled, your saved payment card is automatically charged when your available balance reaches a predefined threshold. This way, you can keep sending messages without manually adding funds to your account.
Why Is Automatic Top-Up Important?
Automatic Top-Up helps you avoid interruptions and keep your messaging activities running smoothly.
With this feature, you can:
- Save time: Automatically replenish your balance without manual top-ups.
- Avoid interruptions: Keep your messaging campaigns running smoothly without worrying about insufficient balance.
- Keep your Viber service active: Maintain sufficient balance to cover your Viber Sender ID's monthly subscription fee and reduce the risk of service interruptions.
How to Enable Automatic Top-Up
Step 1: Access Your Account Settings
- Log in to your Apifon Mookee account.
- Click on your account name in the top-right corner of the blue navigation bar.
- Select Account from the dropdown menu.
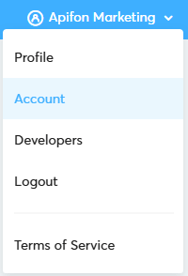
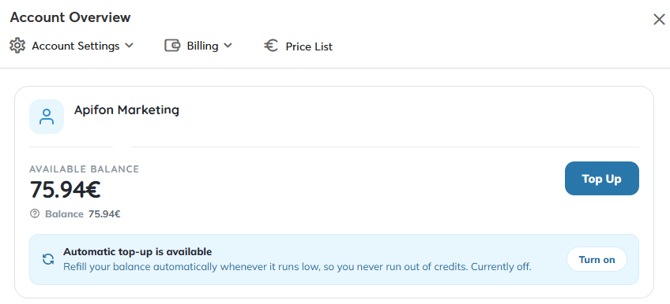
- The Account Overview page will appear, displaying your available balance and account settings.
Step 2: Turn On Automatic Top-Up
Under the Available Balance section, locate the blue banner displaying:
"Automatic top-up is available"
Click Turn on to start setting up Automatic Top-Up.

A new panel will open, allowing you to configure your automatic balance replenishment preferences.
Step 3: Set Your Automatic Top-Up Preferences
You will need to configure two amounts:
1. When available balance reaches
Choose the balance threshold that will trigger an automatic top-up.
You can select one of the predefined amounts (€5, €10, €20, or €50) or enter a custom amount.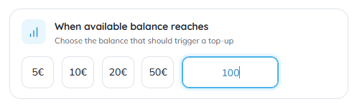
2. Top up with
Choose how much credit should be added to your account each time Automatic Top-Up is triggered.
You can select one of the predefined amounts (€10, €20, €30, €40, or €50) or enter a custom amount.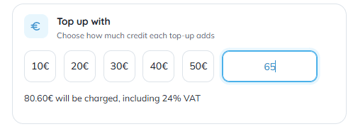
The top-up amount is displayed excluding VAT. Once you select an amount, the total charge, including 24% VAT, will appear directly below.
Example:
Suppose you configure the following:
- When available balance reaches: €100
- Top up with: €65
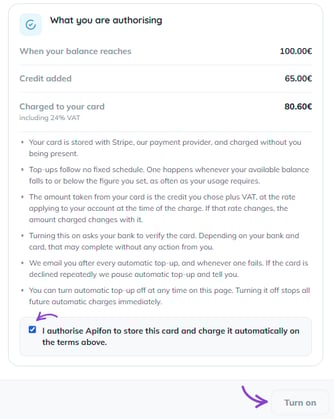
When your available balance falls to €100, the system will automatically charge €80.60 (including 24% VAT) to your saved payment card and add €65 to your account balance.
Your new available balance will be €165, assuming the payment is successful.
Step 4: Add or Select a Payment Card
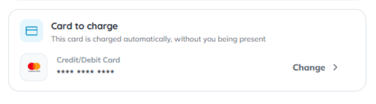
Under the Card to charge section, select the credit or debit card that will be used for automatic payments.
- If you already have a saved payment card, you can select it or click Change to choose a different payment method.
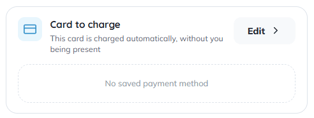
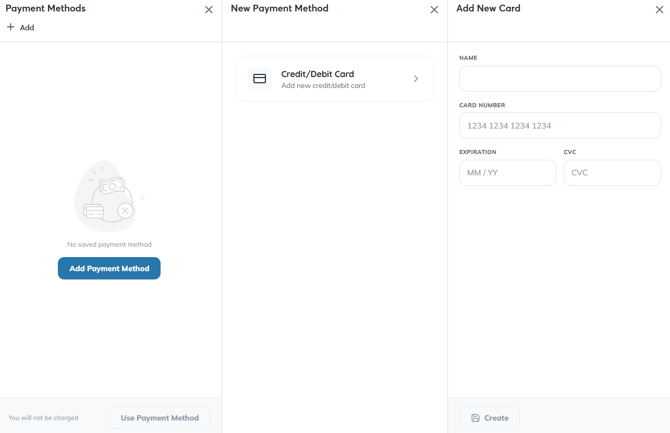
- If no payment method is available, click Edit, then Add Payment Method, and select Credit/Debit Card to register a new card.
Card Authentication
After entering your card details, click Create.
For security purposes, you may be asked to authenticate your card through your bank's mobile app.
- Open the notification received on your mobile phone from your bank.
- Review and confirm the authentication request in your bank's mobile app within the specified time limit.
- Return to the authentication pop-up and click Continue to complete the process.
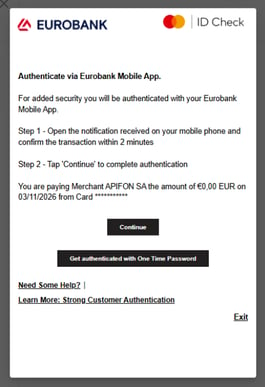
Once authentication is successfully completed, your card will be saved and available for Automatic Top-Up.
Depending on your bank, you may also have the option to authenticate using a One-Time Password (OTP). A €0.00 verification transaction may appear during this process.
Step 5: Authorise Automatic Top-Up
Review the authorisation section, including your top-up settings, total card charge (including VAT), and payment terms.
To complete the setup:
- Tick the checkbox "I authorise Apifon to store this card and charge it automatically on the terms above."
- Click Turn on to activate Automatic Top-Up.
Step 6: Confirm That Automatic Top-Up Is Enabled
Once Automatic Top-Up has been successfully enabled, the banner under your available balance will turn green, confirming that the feature is active.
The green banner will display "Automatic top-up is on", along with your selected top-up amount, balance threshold, and payment card.
You will also receive an email notification after every successful Automatic Top-Up or whenever an automatic payment fails.
How to Manage or Disable Automatic Top-Up
You can update your Automatic Top-Up settings or disable the feature at any time.
Change Your Automatic Top-Up Settings
- From Account Overview, locate the green Automatic top-up is on banner.
- Click Manage.
- Update the balance threshold, top-up amount, or payment card as needed.
Turn Off Automatic Top-Up
If you no longer wish to use the feature:
- Open Account Overview and click Manage on the green Automatic Top-Up banner.
- Select Turn off at the bottom of the panel.

Automatic Top-Up will be disabled, and your account will no longer automatically replenish its balance.
You can reactivate it by clicking Turn on again.
Now you know how to enable and manage Automatic Top-Up in your Apifon account.
Thanks for reading!