- Email verification and domain authentication are optional. If an email address is unverified, the suffix .send.mail-apifon.com will be added as an extension to your sender's email address.
- You can choose these actions to reduce the chances of your emails ending up in Junk/SPAM folders, protect your domain reputation, and maintain and grow an engaged audience.
- Email Verification proves you are using a valid email address. It enables you to send with a specific email address as the sender ("From") email, without the Apifon suffix.
- Domain Authentication proves you have access rights to the domain of your sender email. It enables you to use any email address with this specific domain as the sender, without the Apifon suffix.
Email Verification
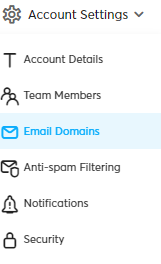
- Click on your Account Name from the blue bar at the top, and then Account > Account Settings > Email Domains.
- Click Add.
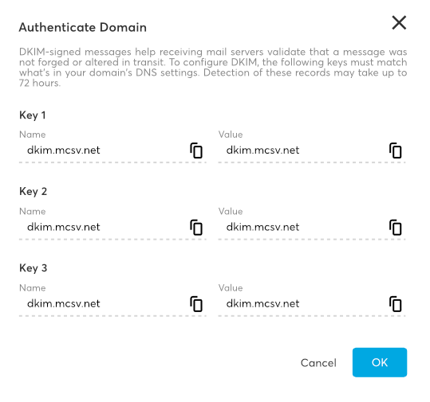
- Type the email address you want to verify, and then Send Verification. A popup window will appear displaying 3 DKIM keys (name/value). You will then need to create 3 CNAME records on your website’s or application’s DNS server.
- Check your inbox and Junk/SPAM folder for the email with the confirmation URL.
- Click on the confirmation URL.
- The email status in the platform will change from Pending to Verified.
- The verification URL expires in 24 hours.
- If the URL expires before you verify the email, the address will remain in a pending status. To verify it, delete the pending email address and add it again.
- You can delete an email address by clicking the menu button
 on its right side and choosing Delete.
Domain Authentication
You need a Pro Plan to authenticate your domain.
- Verify your email address using the form example@domain.com, like the ones below.
- Click the menu button on the right side of this verified address and choose Authenticate.

- A pop-up window will appear displaying the DKIM keys (name/value). You will need to create three CNAME records on the DNS server of your website or application. Copy the provided DKIM keys and add them to the DNS server of your website or application.
- Click the OK button.
- After the DNS records are entered correctly, the domain status will change from Pending to Authenticated.
- Make sure the records you create at your domain panel are CNAME-type records.
- The maximum waiting time for servers to recognize your changes is 72 hours. If the status remains Pending after this time, reach out to your domain provider's help site for tips on troubleshooting records in their service.
- You can have access to the DKIM Keys anytime, by clicking the menu button
 on the right side of your address and choosing View Details.
-
If you have no SPF record on your domain, simply publish the following SPF record on it:
v=spf1 include:nl.apifon-mail.com -allIf you already have an SPF record, simply add include:nl.apifon-mail.com immediately before the terminating mechanism in that record.
For example, if your current SPF record looks like this:
v=spf1 a -allupdate it to:
v=spf1 a include:nl.apifon-mail.com -all
7. Finally, you will need to include also a CNAME:
nl.<YOUR_DOMAIN> to nl.apifon-mail.com
Now you know how to verify your email address and authenticate your domain on the Apifon platform. 🚀
Thank you for reading!