Export Viber Tracking Report
In this article, we will guide you through the process of exporting a Viber tracking report on the Apifon platform.
Task Roadmap
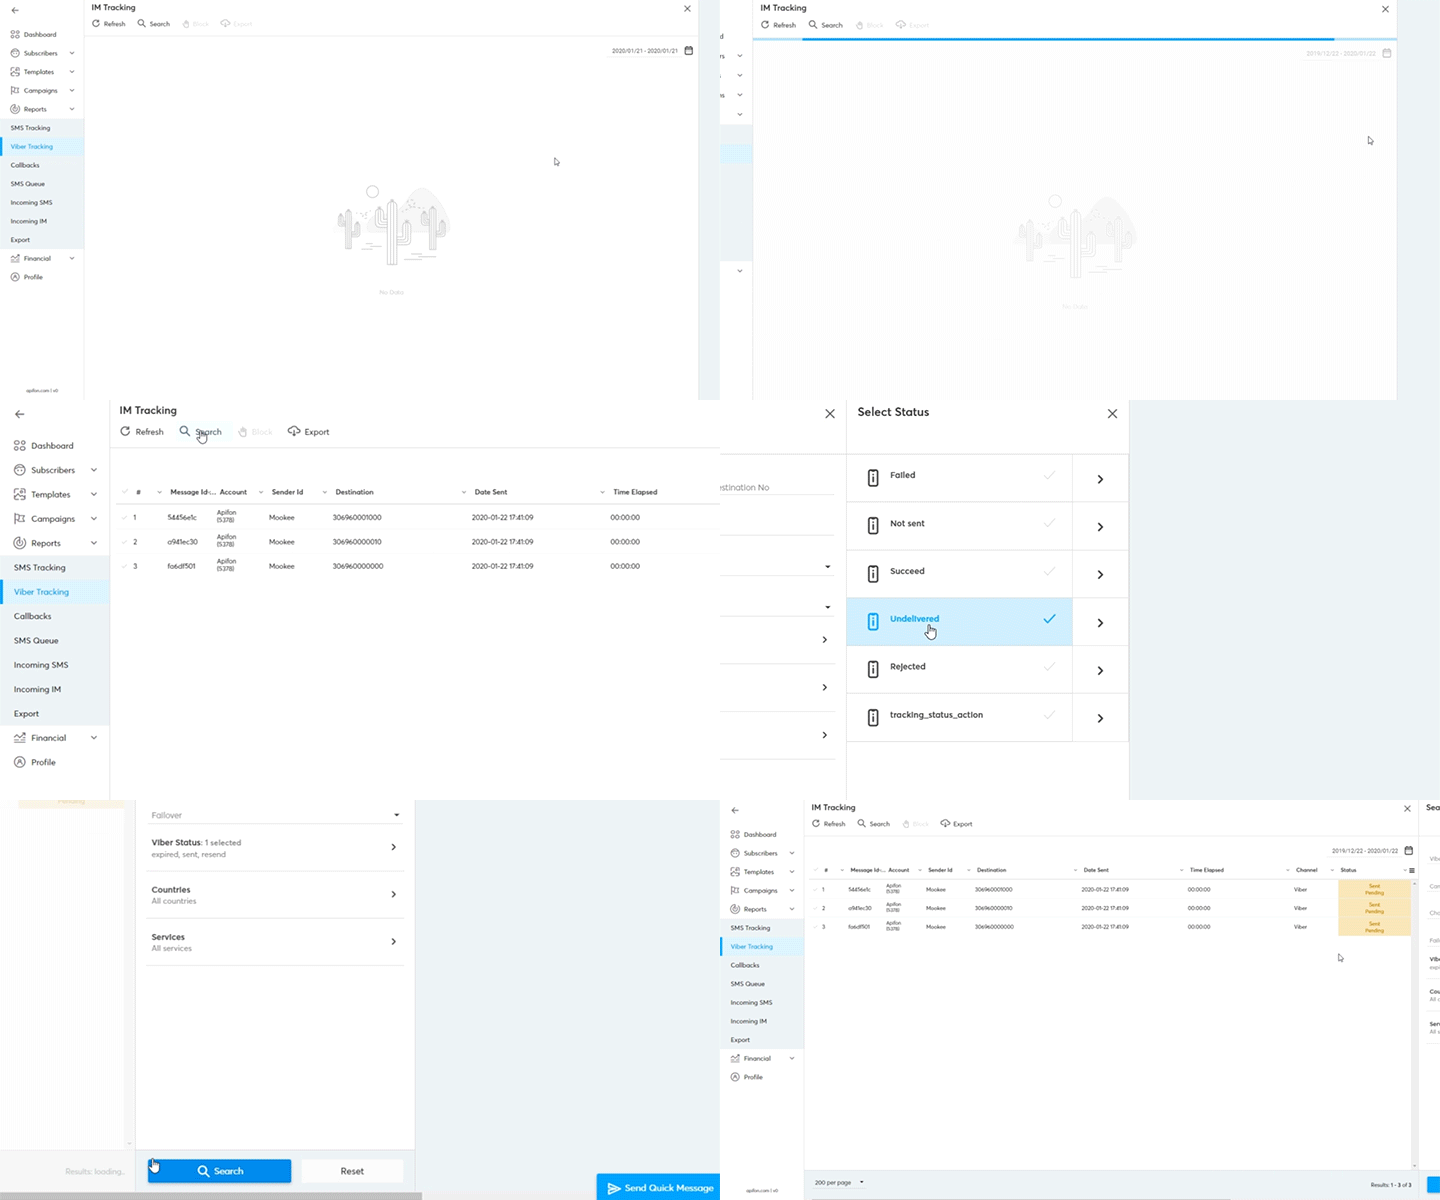
To get started, navigate from the Dashboard to: Reports > Viber Tracking
![]()
A. Data customization
Before exporting, you can tailor the visible data by following these steps:
-
Set the time frame for your report by selecting the calendar
 at the top.
 -
Click Search in the Viber Tracking menu

or
Click the three lines (☰) icon in the upper right corner.
You can filter and customize the data using the following parameters:
-
Message ID
- Request ID
- Viber Sender ID
-
Destination
- Channel
- Promotional
-
Failover
-
Viber Status
-
Countries
-
Service
B. Export
To export the Viber tracking results:
-
Click Export from under the Viber Tracking menu.

-
In the pop-up window, type a name for your exported file.

-
Choose the number of rows to export (select "All rows" to export everything).

-
Select the file format for export:
.xlsxor.csv.
-
The Include pivot table option is enabled by default. If you want a summary of your data in a separate Excel sheet, leave it checked; otherwise, you can uncheck it.

-
The Column names in the first row option will be enabled by default to include headers in your file.

-
Click Export.

You will receive an email notification once the file is ready for download.
Accessing Your Export
-
Navigate to the main Dashboard, then select Reports > Export.
-
Here you’ll find all previously exported files, with details such as:
-
The user who requested the export
-
Date of the export request
-
File name
-
-
Click the Download button
 to get your file.
Now you know how to export Viber tracking results.
Thank you for reading!