What are automations?
Automations on the Apifon platform are workflows that allow you to send automated, highly personalized email campaigns to boost your engagement with your audience.
Why are automations important?
- Time Management: Convert regularly sent campaigns to automations and reduce the time you spend on content creation so you can focus on other aspects of your business and increase your ROI.
- Targeted messages: Set up triggers and conditions to send messages based on specific criteria, ensuring that your audience receives relevant content when it matters the most.
- Brand consistency: Maintain consistency in your communication strategy. Whether a welcome series for new subscribers or a follow-up sequence, automations ensure that each contact goes through the same predefined journey.
- Easy scaling: Scale your efforts without a proportional increase in manual work, even if you have a large list to manage.
How do automations work?
To access automations, click on Automations on the menu on the left.
You can select one of the popular automations or add a new one by choosing a trigger type.
To create a new automation, you need to select a trigger type, design the content of the automated email, and edit the message settings. This way, each time a specific event occurs (the trigger), your contact will automatically receive the personalized message you designed.
- Triggers are any events that cause an automated message to be sent. They can be based on different criteria, like date, time, and subscriber behavior.
- There are different automation types, depending on the trigger they use (e.g. Date-based Automation uses a specific date as a trigger).
Create an Automation
To create a new automation, follow the steps below:
- Click on Automations, and then
 Add.
Add. - Type your automation name. This name will only be accessible within your Apifon account and will not be visible to your subscribers.
- Click Create.

- Design your automation. Select your list, segment, and type of trigger. Then, edit the automation and message settings, create the message content, and schedule your automation.
- Check the automation Summary, click Activate Automation, and confirm Activate.

For more detailed instructions on the Automation Design process, please check the specific articles on each automation type.
Automation Status
There are 3 statuses for automations: Active, Inactive, and Setup.
1. Active Status

When an automation is in Active status, the platform automatically sends messages based on the automation's trigger and design.
To review the automation settings, click on the automation to view the Summary step of the automation creation process.
In case you want to edit the automation, you need to deactivate it first.
2. Inactive Status
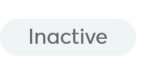
When an automation is in Inactive status, no messages will be sent until the automation is activated again, but they continue to be scheduled.
To deactivate an automation, click on the automation, then Deactivate Automation, and confirm Deactivate.

When an automation is deactivated, you may edit the content of the automation and click on Resume Automation to re-activate it. 
3. Set-up Status

Automations in Setup status can be edited, allowing users to change the trigger type and adjust subsequent settings as needed.
So long as an automation is in this status, no messages will be sent.
- While the automation is inactive, any new messages will be scheduled. Once the automation is reactivated, all messages scheduled for dates after reactivation will be sent, ensuring no loss of communication.
- When an automation is reactivated with edited content, all new and previously scheduled messages will include the updated content, ensuring consistency across new communications.
View Automation Summary
To review the automation settings, you can easily access the summary step, the final step of the automation creation process. To ensure clarity, all other steps leading up to this point are disabled for selection.
Now you know how to create and use an automation on the Apifon platform. 🚀
Thank you for reading!