Create a List
In this article, you will learn how to create and set up a list in the Apifon platform.
Each message campaign is linked and addressed to a specific list of your account.
Your lists are essential to keeping your audience data organized and updated.
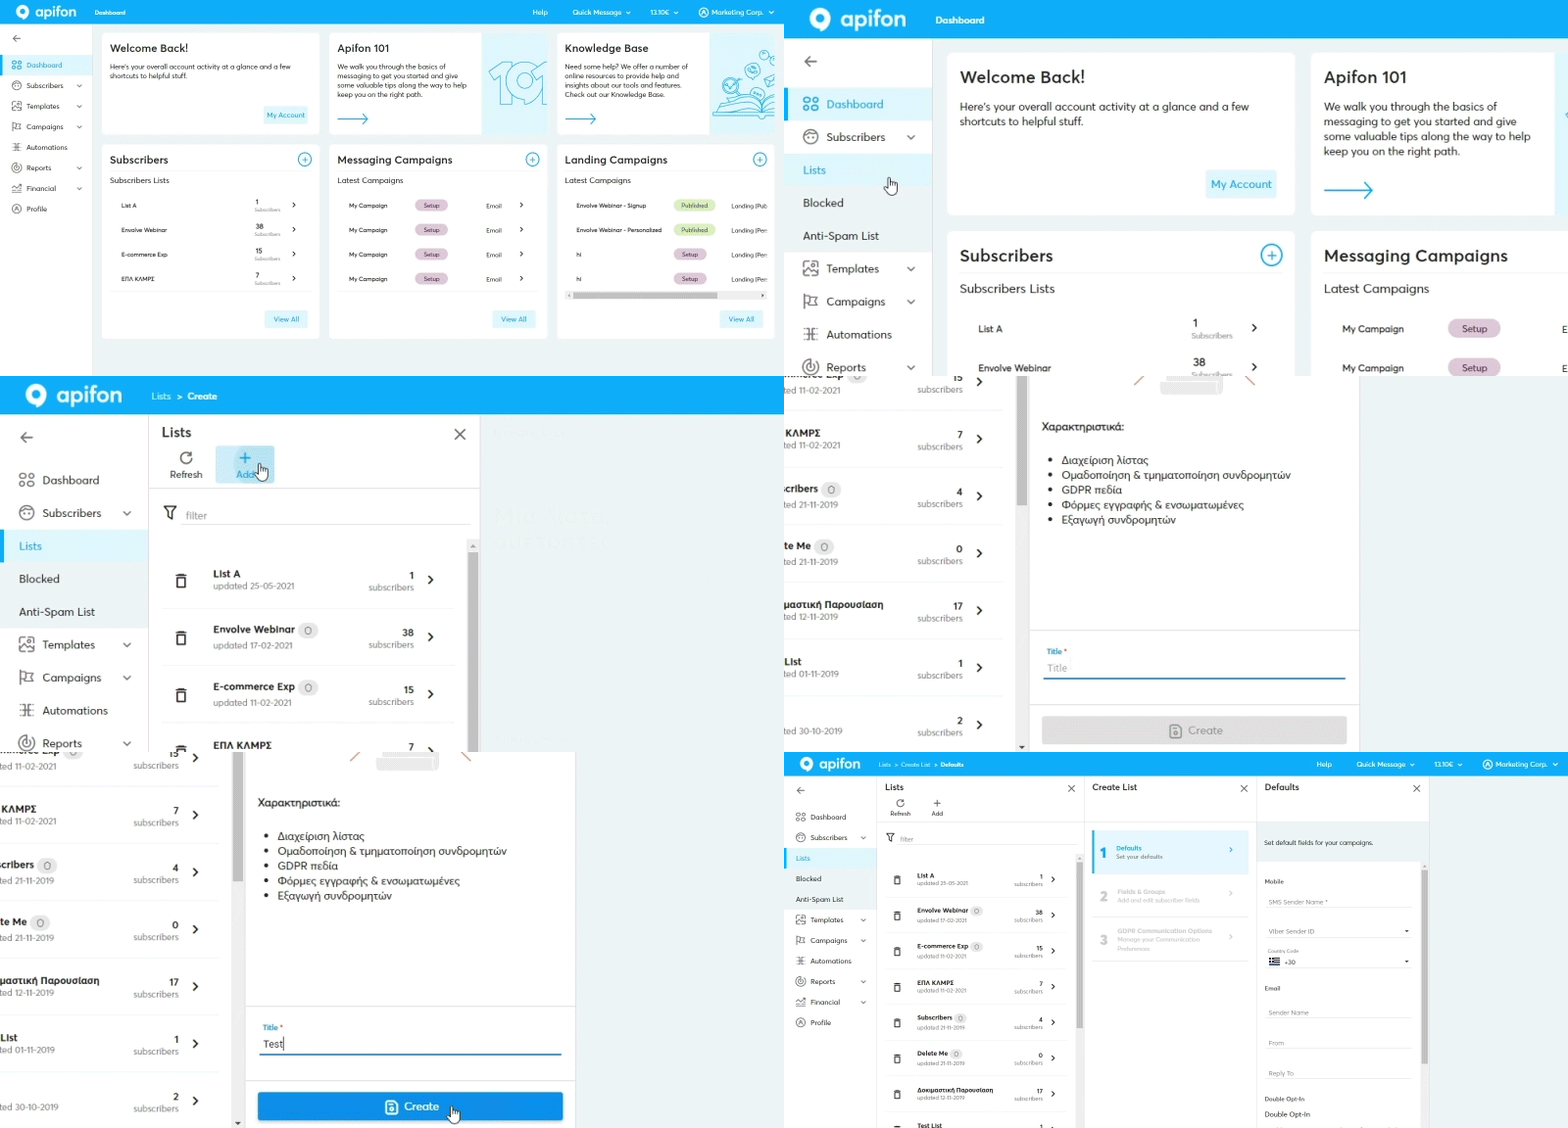
To access your lists, click on Subscribers > Lists.

Here, you can view, delete, add, and edit your lists.
Create a new list
To create a list, follow these steps:
- Click Subscribers > Lists.
- Click
 Add.
Add. - Type your list Title. This is used to identify your list on the platform and will not be visible to your subscribers.
- Click Create.

- Set up your list Defaults, Fields & Groups, and GDPR Communication Options.
- Click Create.
Set up your list
Here, you set up the default settings for your future campaigns linked to this list. You will be able to edit all these settings after you create the list.
 Defaults
SMS (SMS Campaigns, SMS Failover in Viber Campaigns, Mobile Double Opt-in)
- SMS Sender Name (Required): Type up to 11 Latin alphanumeric characters to use as the default sender name for your SMS campaigns.
Viber (Viber Campaigns)
- Viber Sender ID: Select the Sender ID you have registered to Viber. If you don't have a Viber Sender ID yet, feel free to contact your account manager or our sales team at sales@apifon.com.
List import/add
- Country Code: Select the country code for your primary Viber/SMS destination.
Email (Email Campaigns, Email Double Op-tin)
- (Email) Sender Name: Type the name you wish to appear as the sender in email communications.
- From Email: Type the email address you wish to appear as the sender in email communications. Choose to Verify your email to send without the Apifon suffix and get better results in your campaigns.
- Reply To: Type the email address you wish to receive your subscribers' answers.
Sign Up Forms
- Double Opt-In: Check the box(es) with the channels where you wish to activate the Double Opt-In option, to ask for an additional confirmation step from your new subscribers.
 Fields & Groups
-
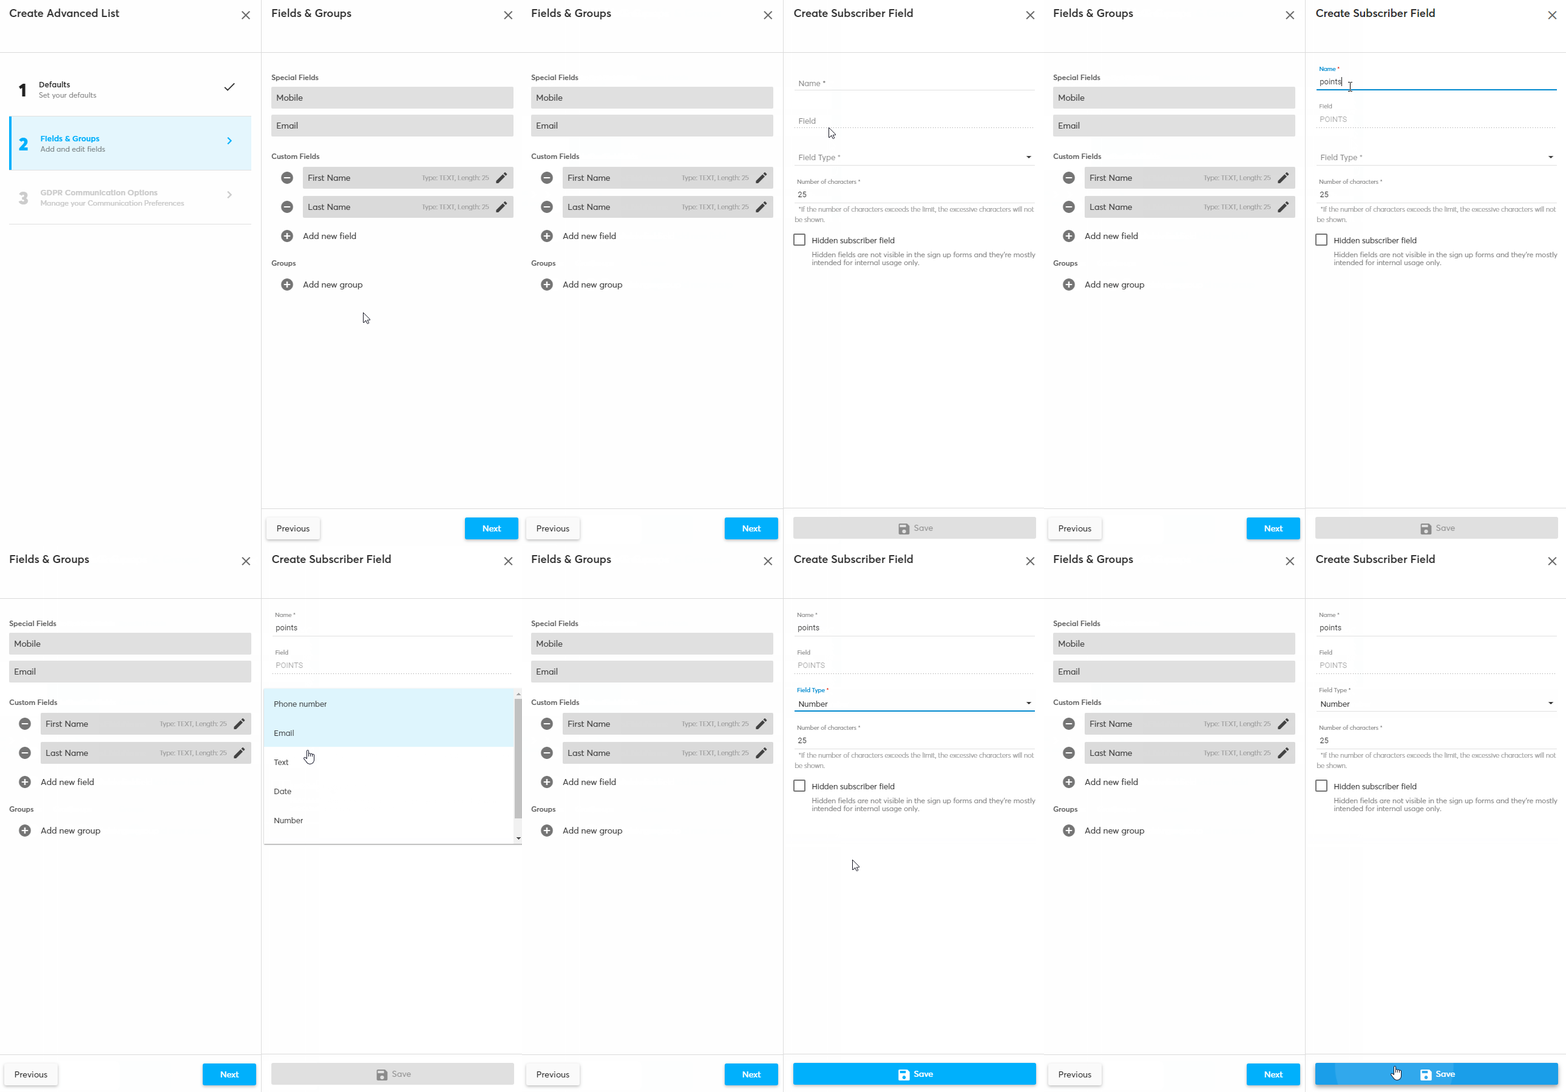
Custom Fields
- Click
 Add new field.
 - Type the name for the field.
- Choose the Field Type. The available options are Phone number, Email, Text, Date, Number, and URL.
- Set up the Number of Characters. This sets the character limit a subscriber can type in a form.
- Click Hidden subscriber field if you don't want your subscribers to see this field in your forms.
- Click Save.

-
Groups
Groups are close-ended and accept specific values according to the options you set when you add or edit the group. To add a new group, follow the steps below:
- Click
 Add new group.
 - Type the Group Name.
- Add the Subgroups. Each subgroup is an alternative option for the group.
-
Choose a Subgroups Selection Type to determine whether a subscriber can be assigned to multiple groups.
-
Click Hide from sign up forms and landing pages if you want to make this group invisible to subscribers, and only use it inside the platform.
- Click Save.
-png.png?width=35&height=44&name=3-1%20(4)-png.png) GDPR Communication Options
GDPR Communication Options
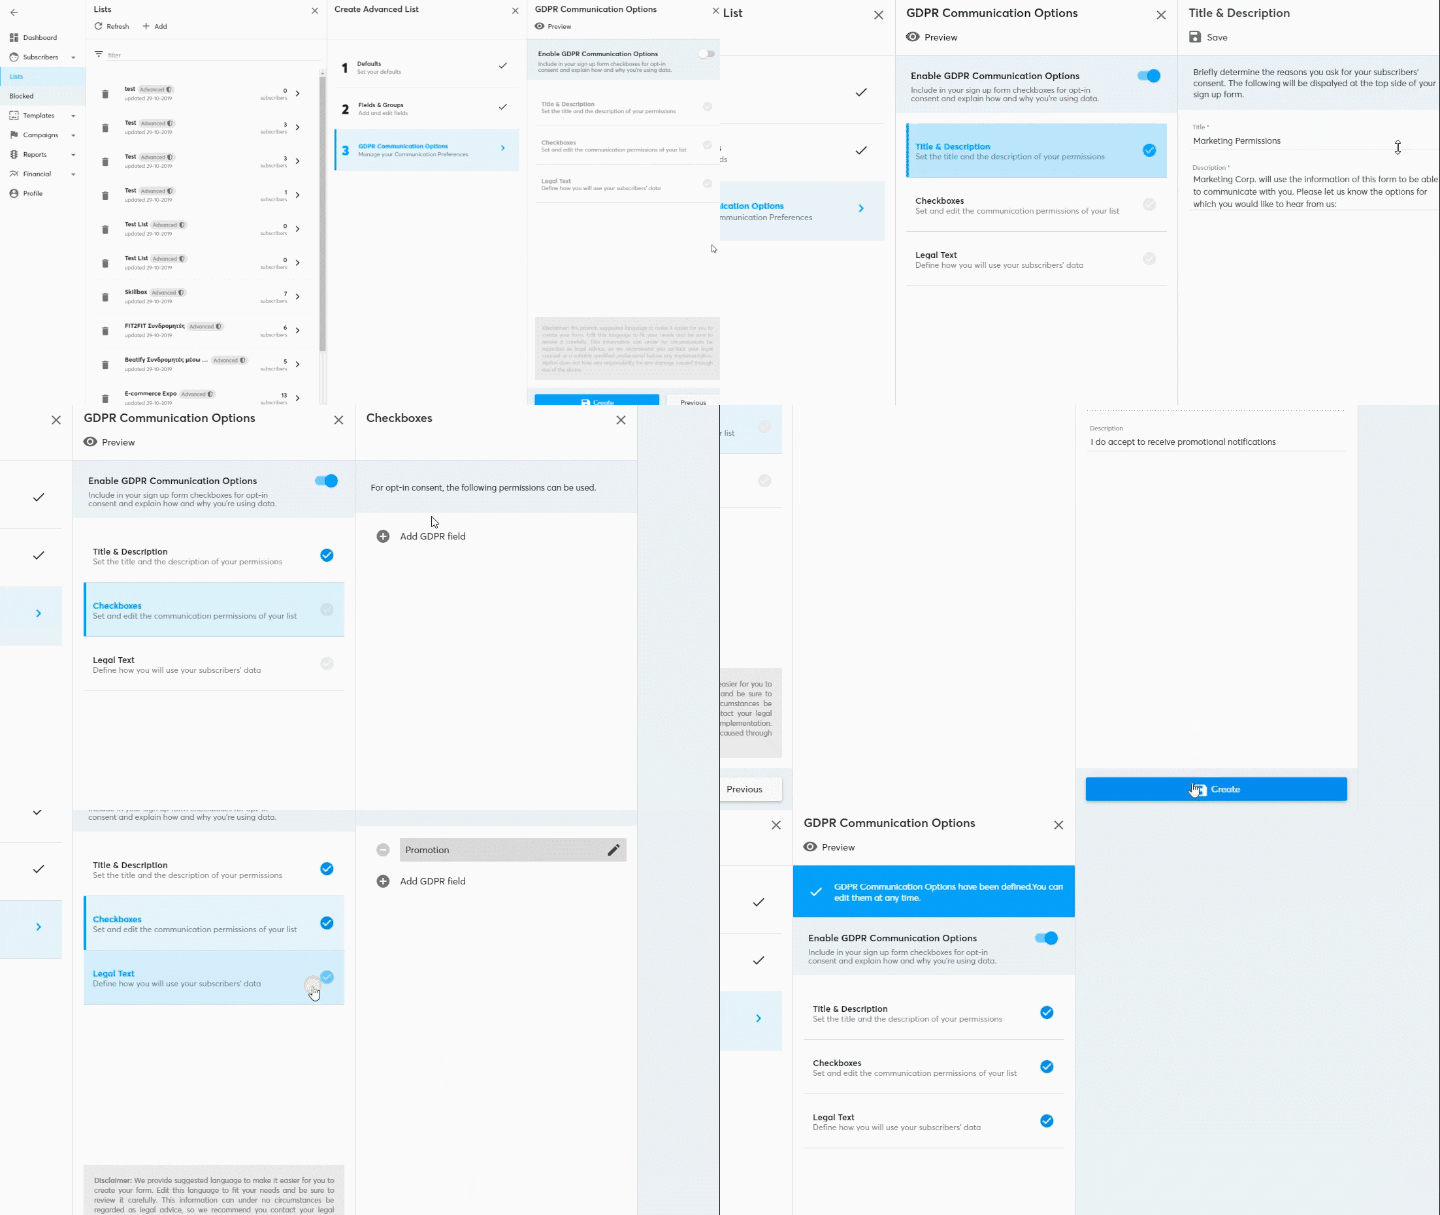
Enable the GDPR Communication Options to include checkboxes for opt-in consent and explain how and why you’re using data in your Signup Forms.
When the GDPR is enabled, your campaign audience will only include subscribers that have already checked the appropriate communication box.
To enable it, click on the switch toggle and edit the Title & Description, the Checkboxes, and the Legal Text that will appear on the Sign Up form.
You may click on  Preview to see your changes.

Now you know how to create and set up a list in the Apifon platform. 🚀
Thank you for reading!